Web Application Branding
ExaVault provides a number of ways to fully brand your account so that your customers do not see the ExaVault brand, from simple changes to logo and color, to completely embedding the ExaVault storage into your website. Among the options:
- You can set a custom logo.
- You may set a company name to appear as the owner of the account.
- You can choose a color scheme.
- You can embed the ExaVault interface in your website, so clients can access files.mycompany.com.
- You can define the email address used by emails sent from your ExaVault account.
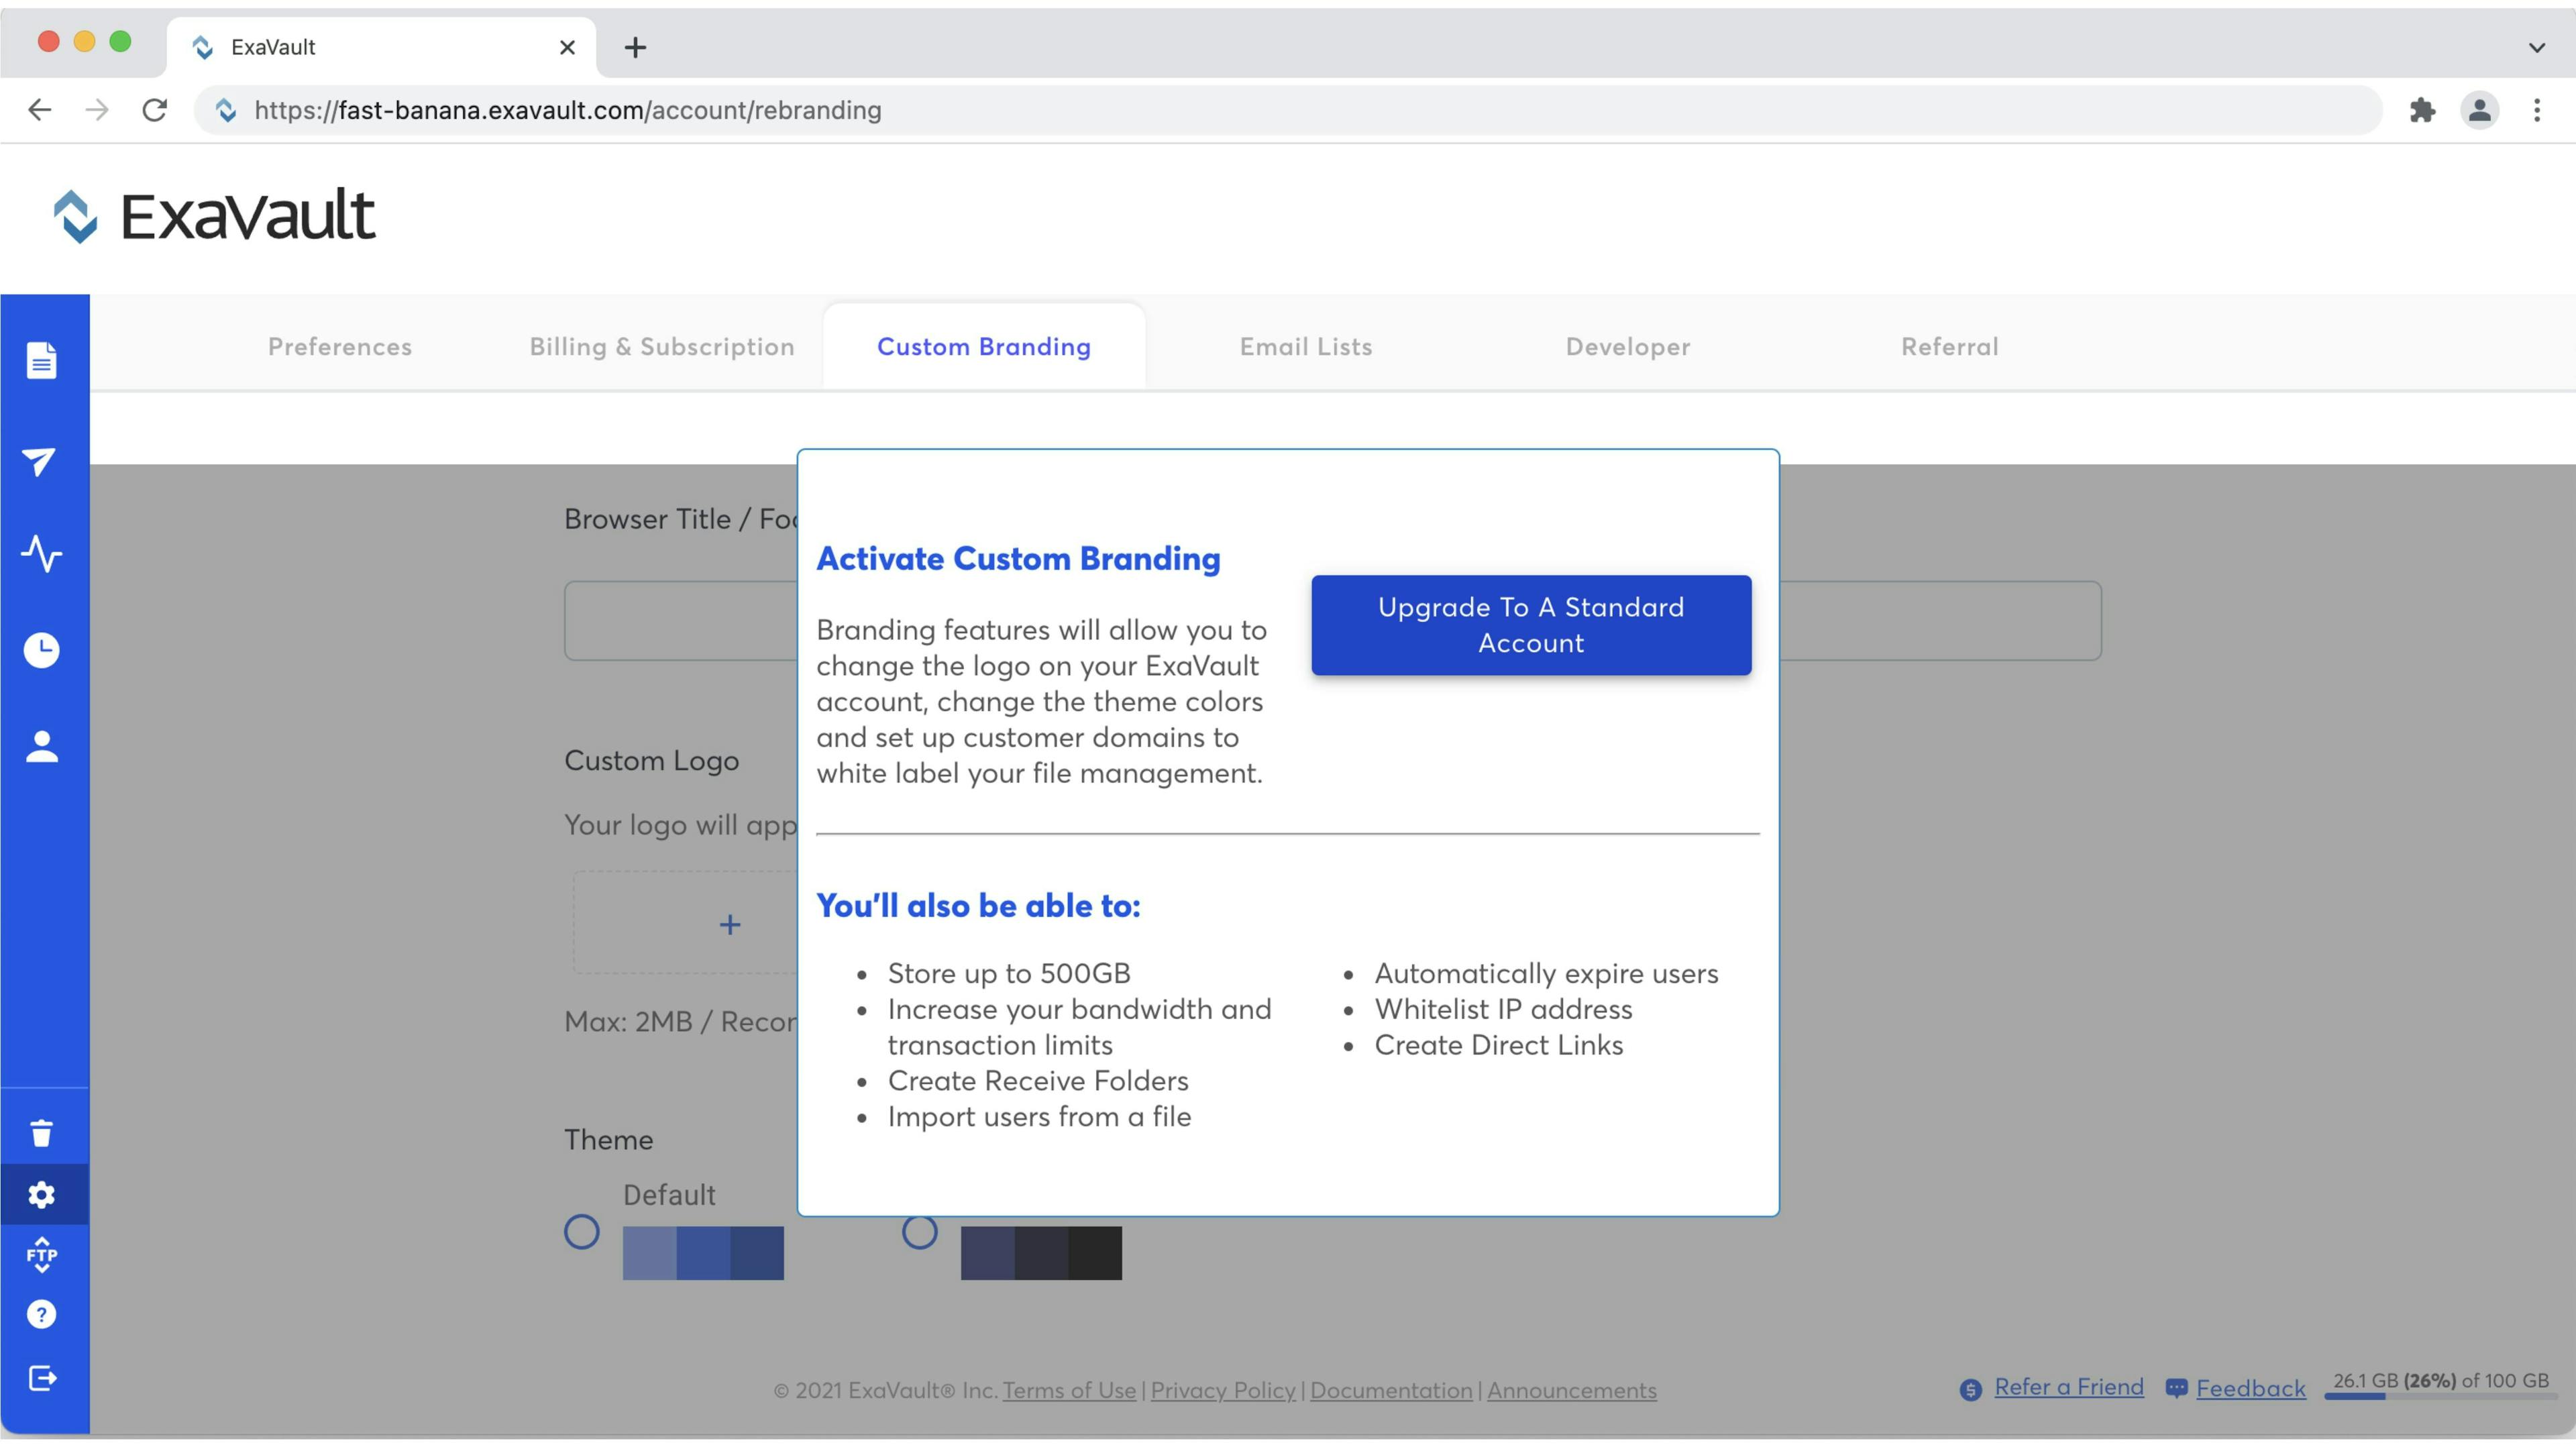
Custom branding is completely optional; you decide how much – or how little – you want to do.
Custom branding is not available in all plans. You may need to upgrade to access this feature.

Custom Name
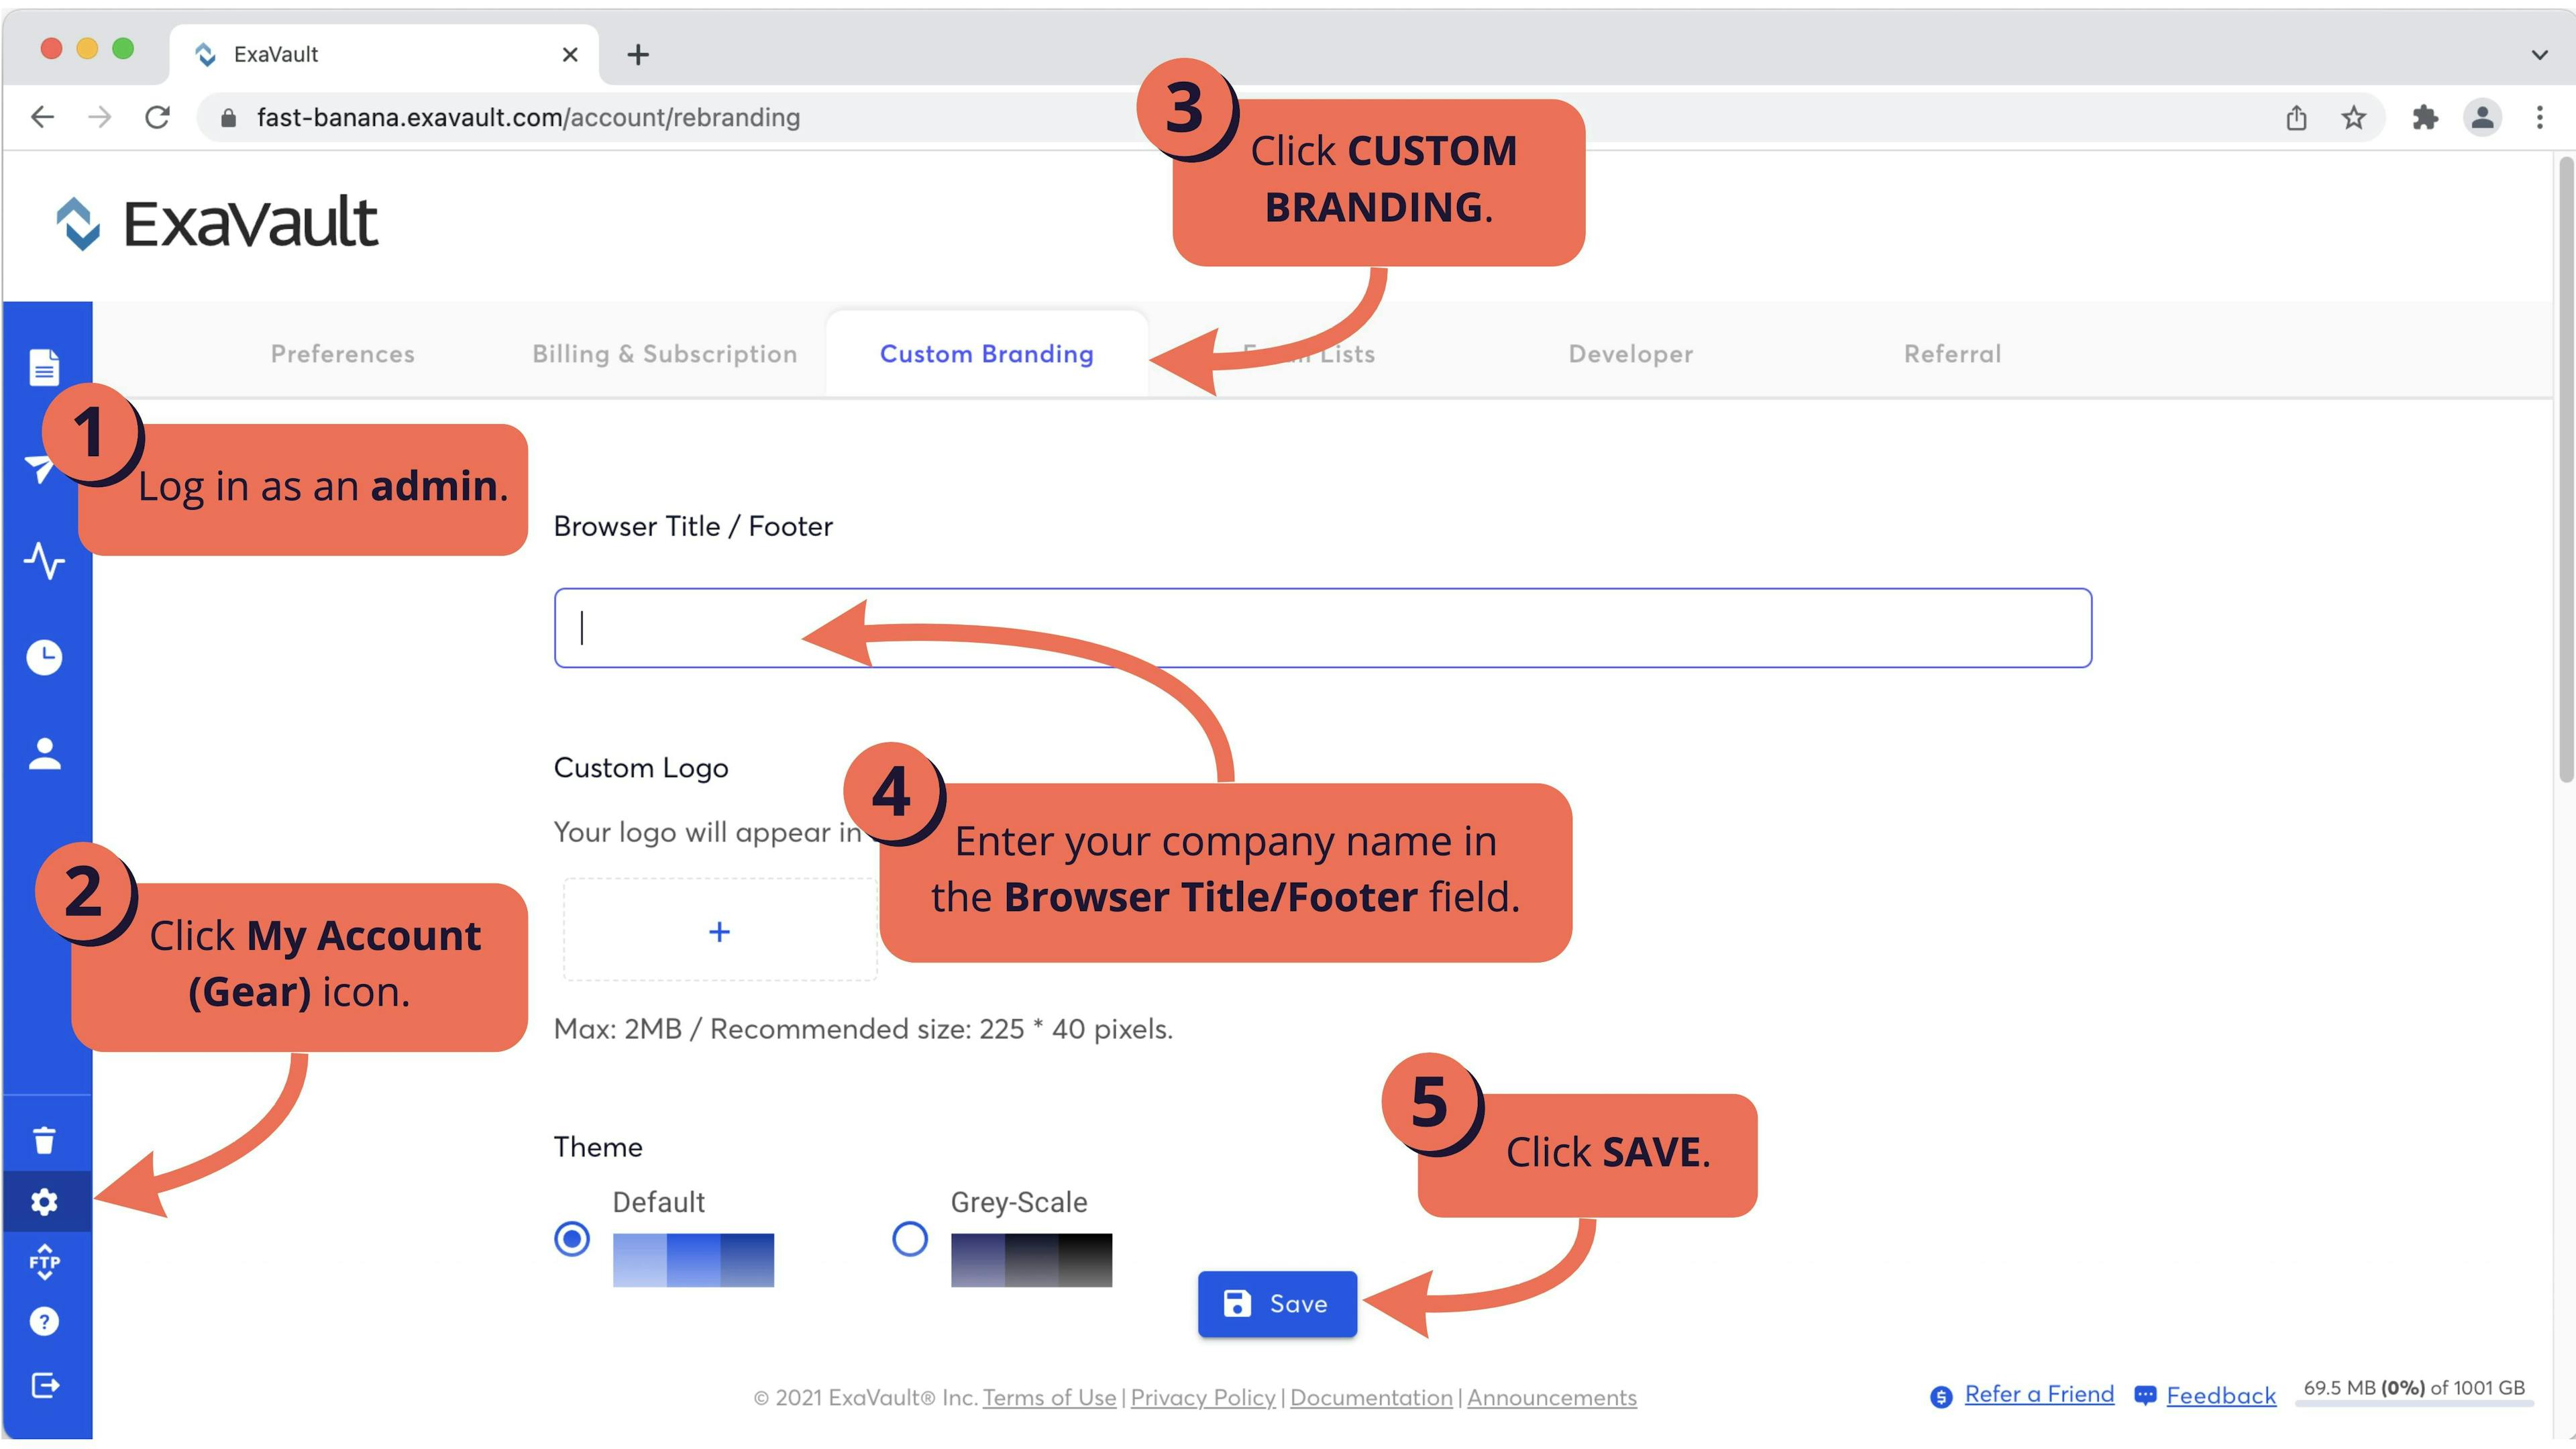
You can change the company name that appears for your account, which will be used in the web interface, emails, notifications, and more. If you have set up a custom logo, you'll almost certainly want to set your company name as well.
To set the company name for your account:
1. Log in as an admin user for your account.
2. Click the My Account button on the main toolbar.
3. Click on the CUSTOM BRANDING tab.
4. Enter your company's name in the Custom Name field.
5. Click the SAVE CHANGES button.
The company name will appear in the following places for all users:
- On all pages of file manager
- On shared folder and sent file invitations
- On notification emails
- On copyright notices
Custom System Email
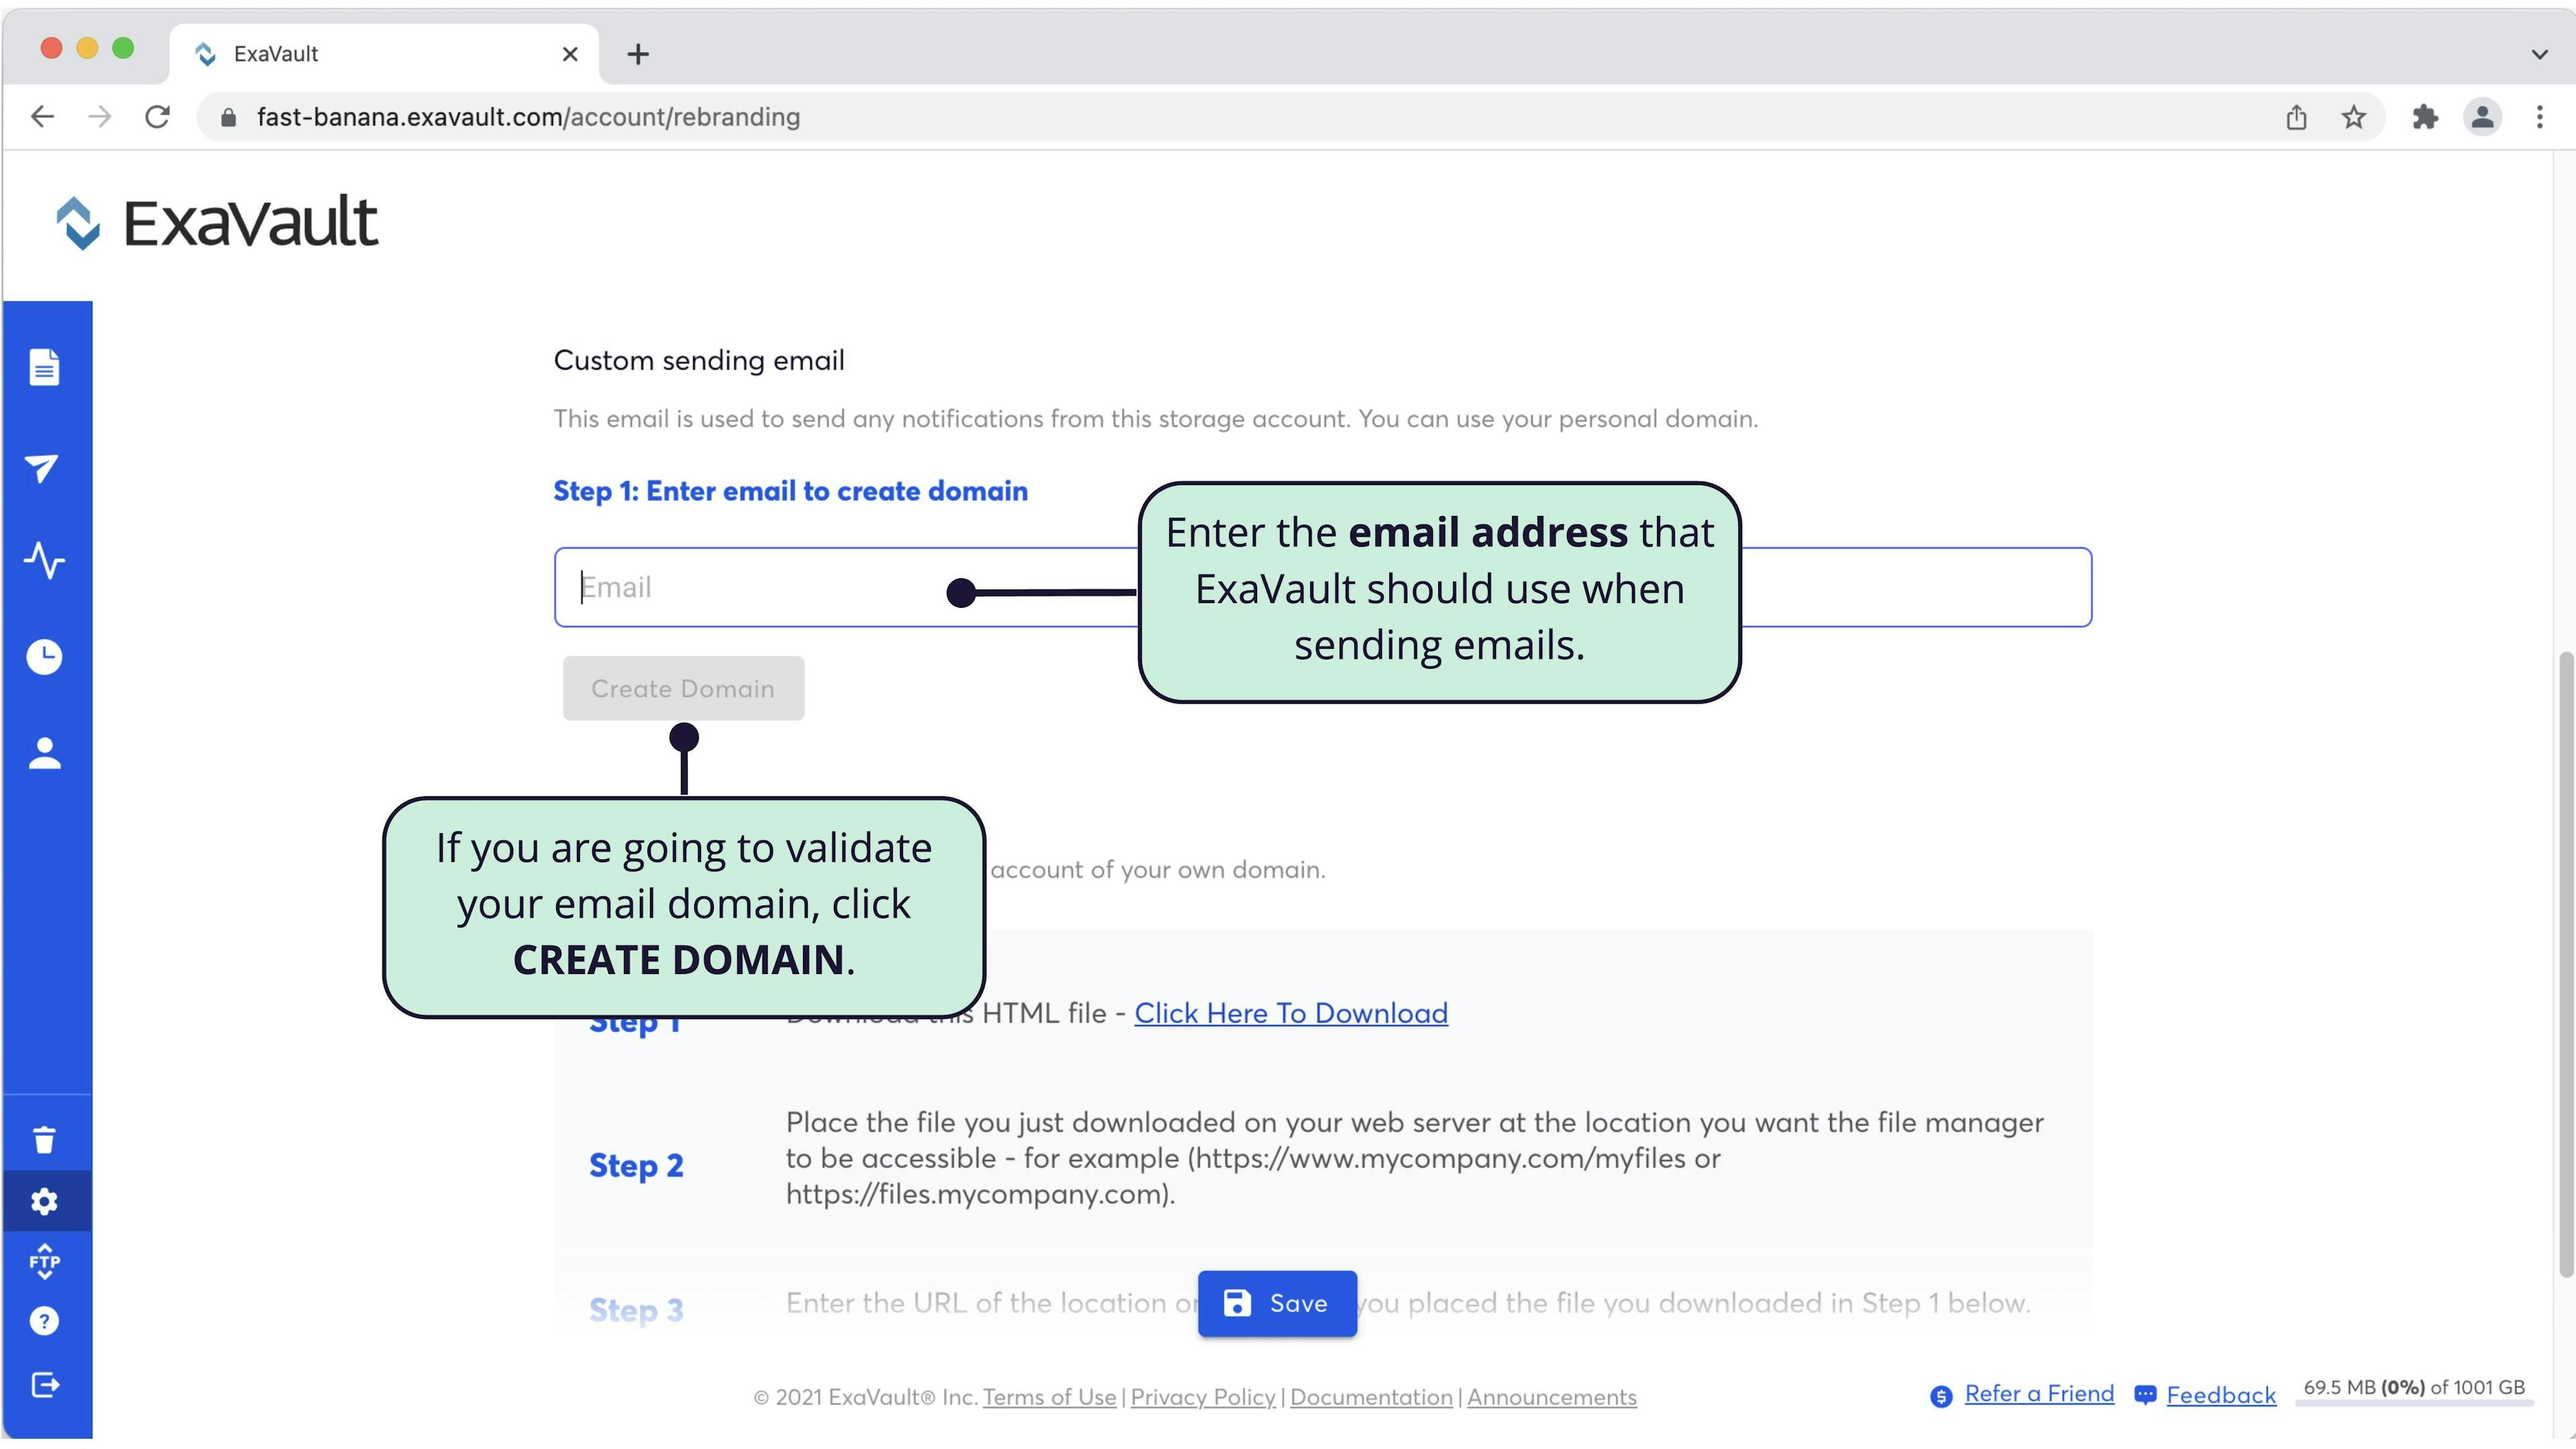
You can define an email address that should be used as the sending email address for emails from ExaVault (send invitations, notifications, welcome emails, etc.).
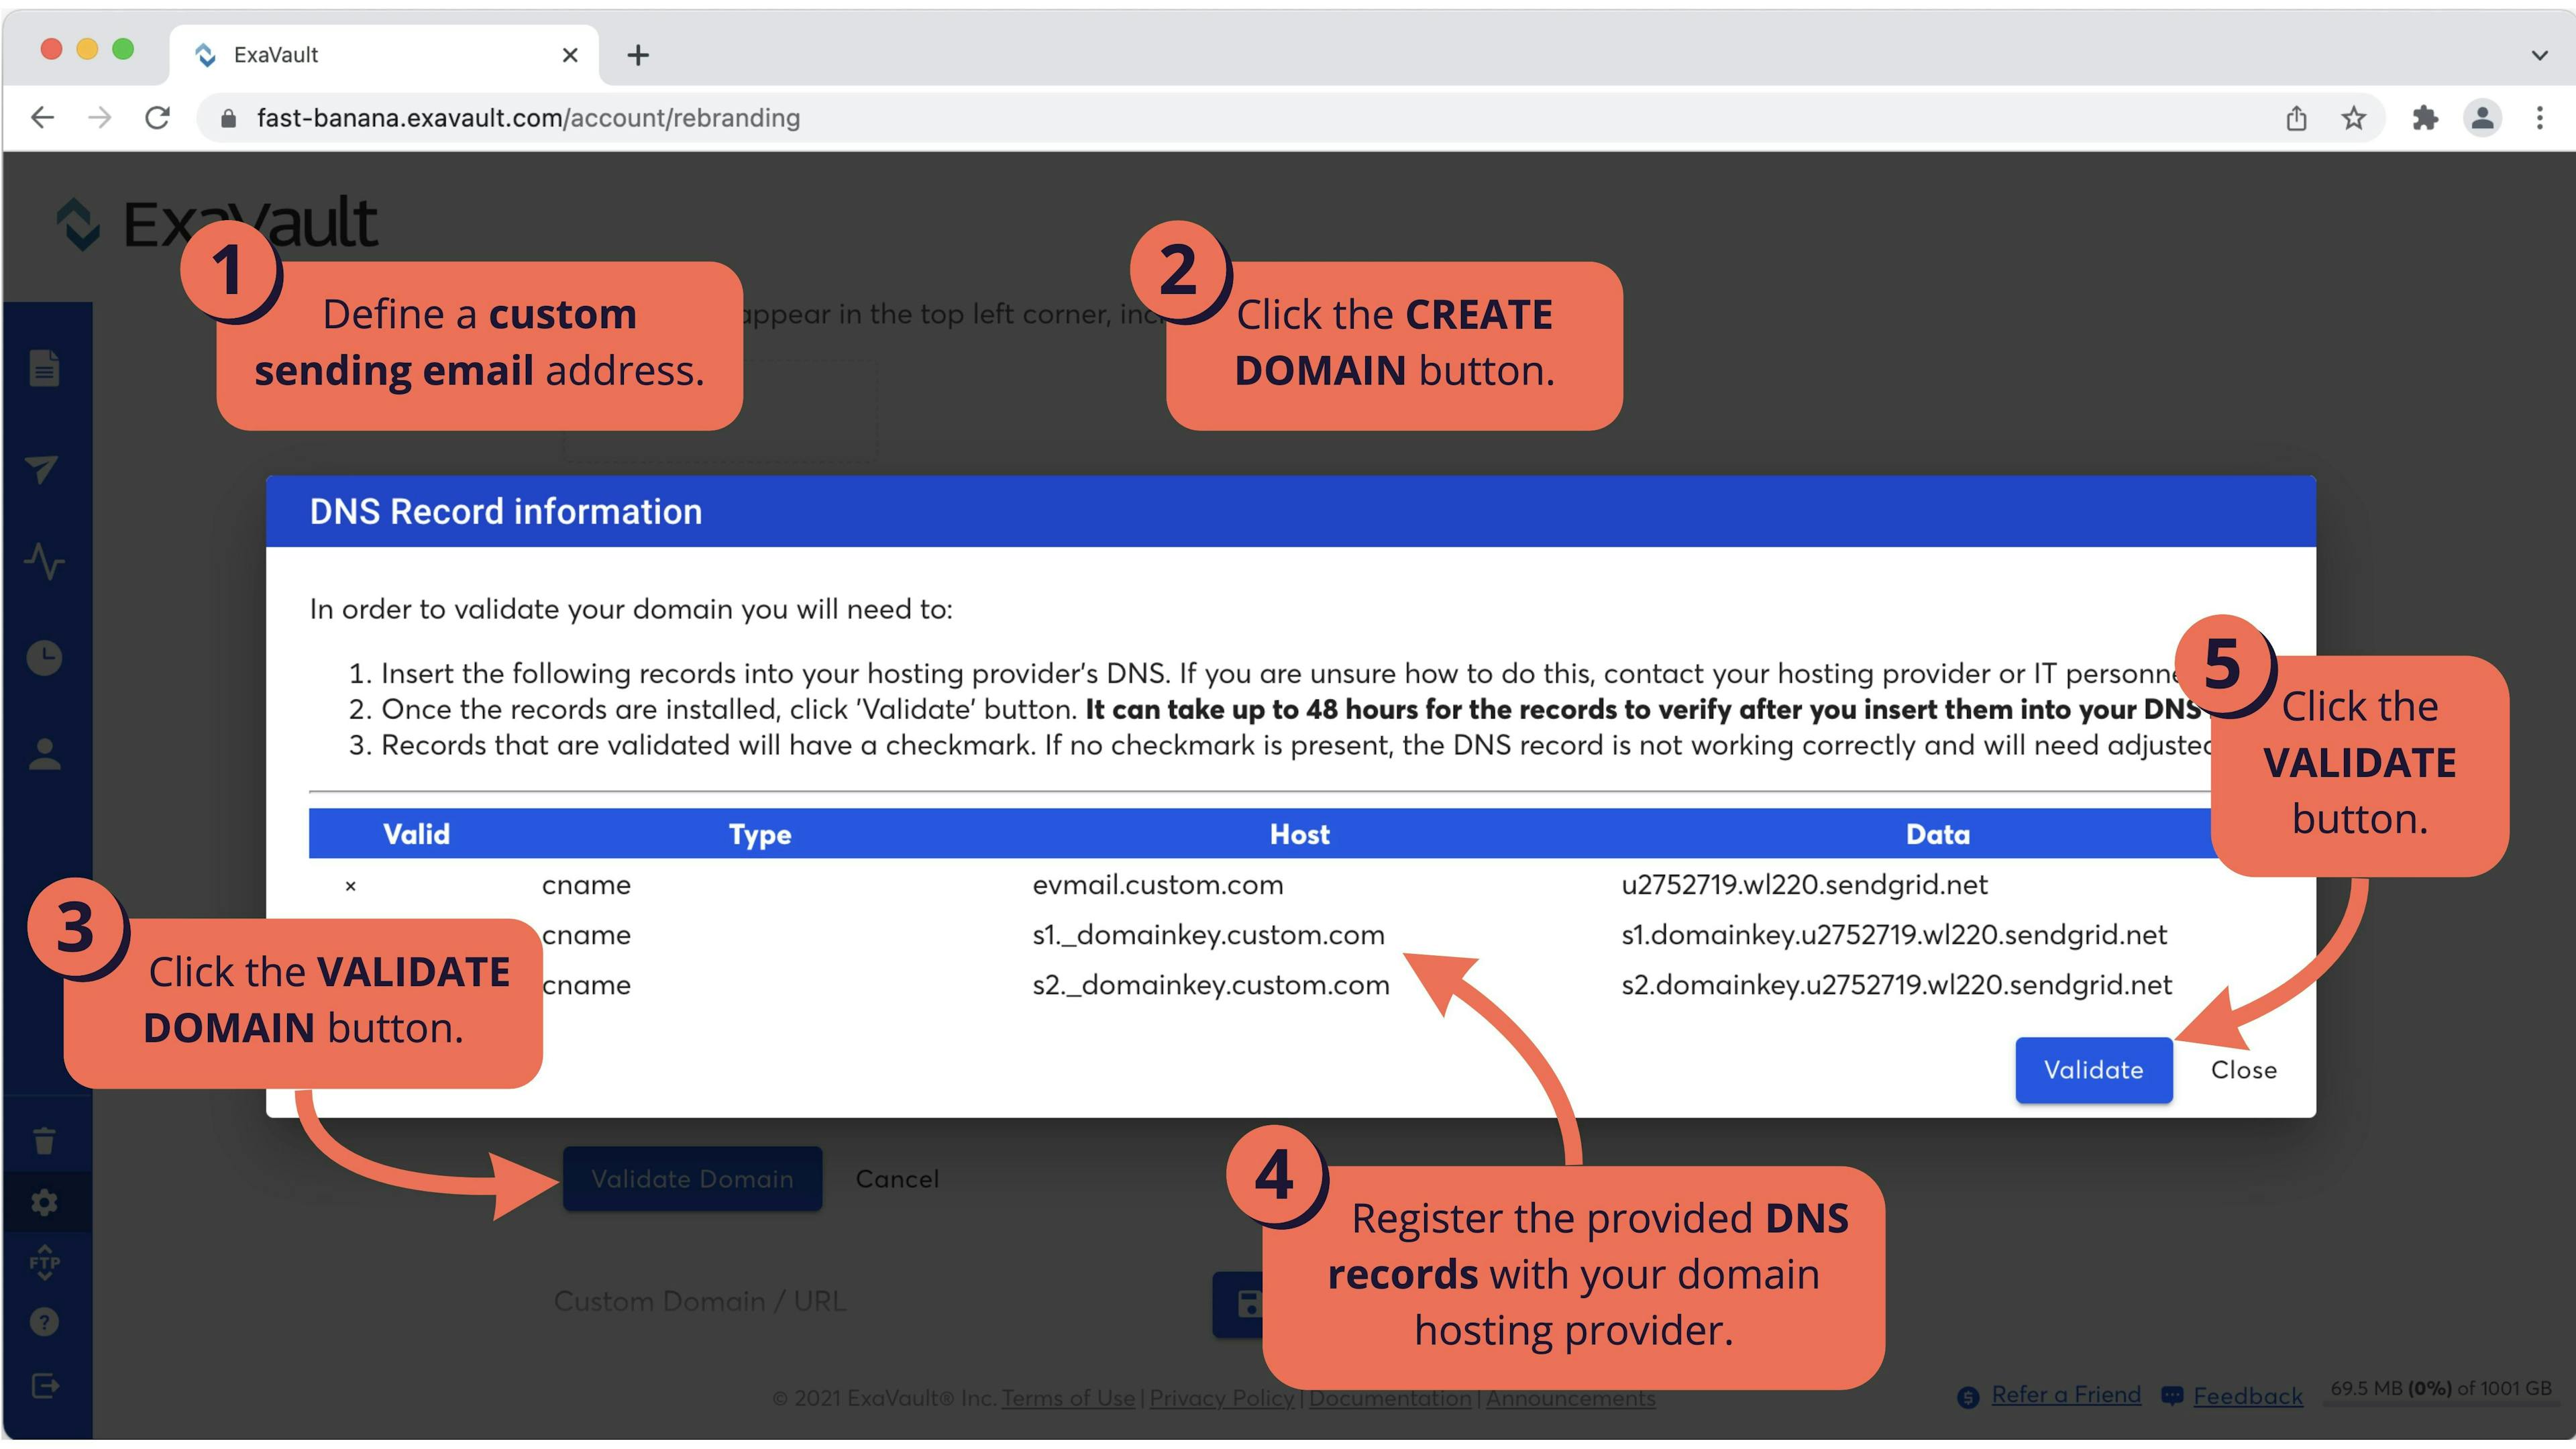
When you set up a custom email address you have the option of whether or not to validate the email address. ExaVault will send emails using the specified email address regardless of whether or not you verify the address. However, many email systems will block email addresses whose domain does not match the sending domain. The validation process registers ExaVault's email servers with your domain so that emails are less likely to be blocked. If you want to use a custom email address, it is strongly recommended to validate the domain address to prevent email delivery problems.
To define a custom sending email address:
1. Log in as an admin user for your account.
2. Click the My Account button on the main toolbar.
3. Click on the CUSTOM BRANDING tab.
4. Enter your sending email address in the email field under the Custom System Email section.
To validate the email address:
1. Follow the steps listed above.
2. Click the CREATE DOMAIN button.
3. Click the VALIDATE DOMAIN button to start the validation process.
4. Register the provided DNS records with your domain hosting provider.
5. Click the Validate button. If your DNS records successfully validate, you will see green checkmarks in the Valid column on the DNS record list.
Custom Logo
You can use your own logo on your account by configuring the custom logo option. To do so:
1. Log in as an admin user for your account.
2. Click the My Account button on the main toolbar.
3. Click on the CUSTOM BRANDING tab.
4. Click the CLICK TO UPLOAD LOGO button for the custom logo.
5. After the logo is uploaded it will be displayed in the account.
The ideal dimensions for a logo are 225×55 pixels and may be no more than 2MB in size.
Custom logos will appear in the following places for all users:
- On all ExaVault file manager pages.
- On shared folder and sent file invitations.
- On notification emails.
File Manager Theme
A color scheme helps you set the web interface to better match your logo.
To set the theme for your account:
1. Log in as an Admin user for your account.
2. Click the My Account button on the main toolbar.
3. Click on the CUSTOM BRANDING tab.
4. Scroll down to the Theme section.
5. Select the theme color scheme.
6. Click the SAVE SETTINGS button.
Using a Custom URL for ExaVault file manager
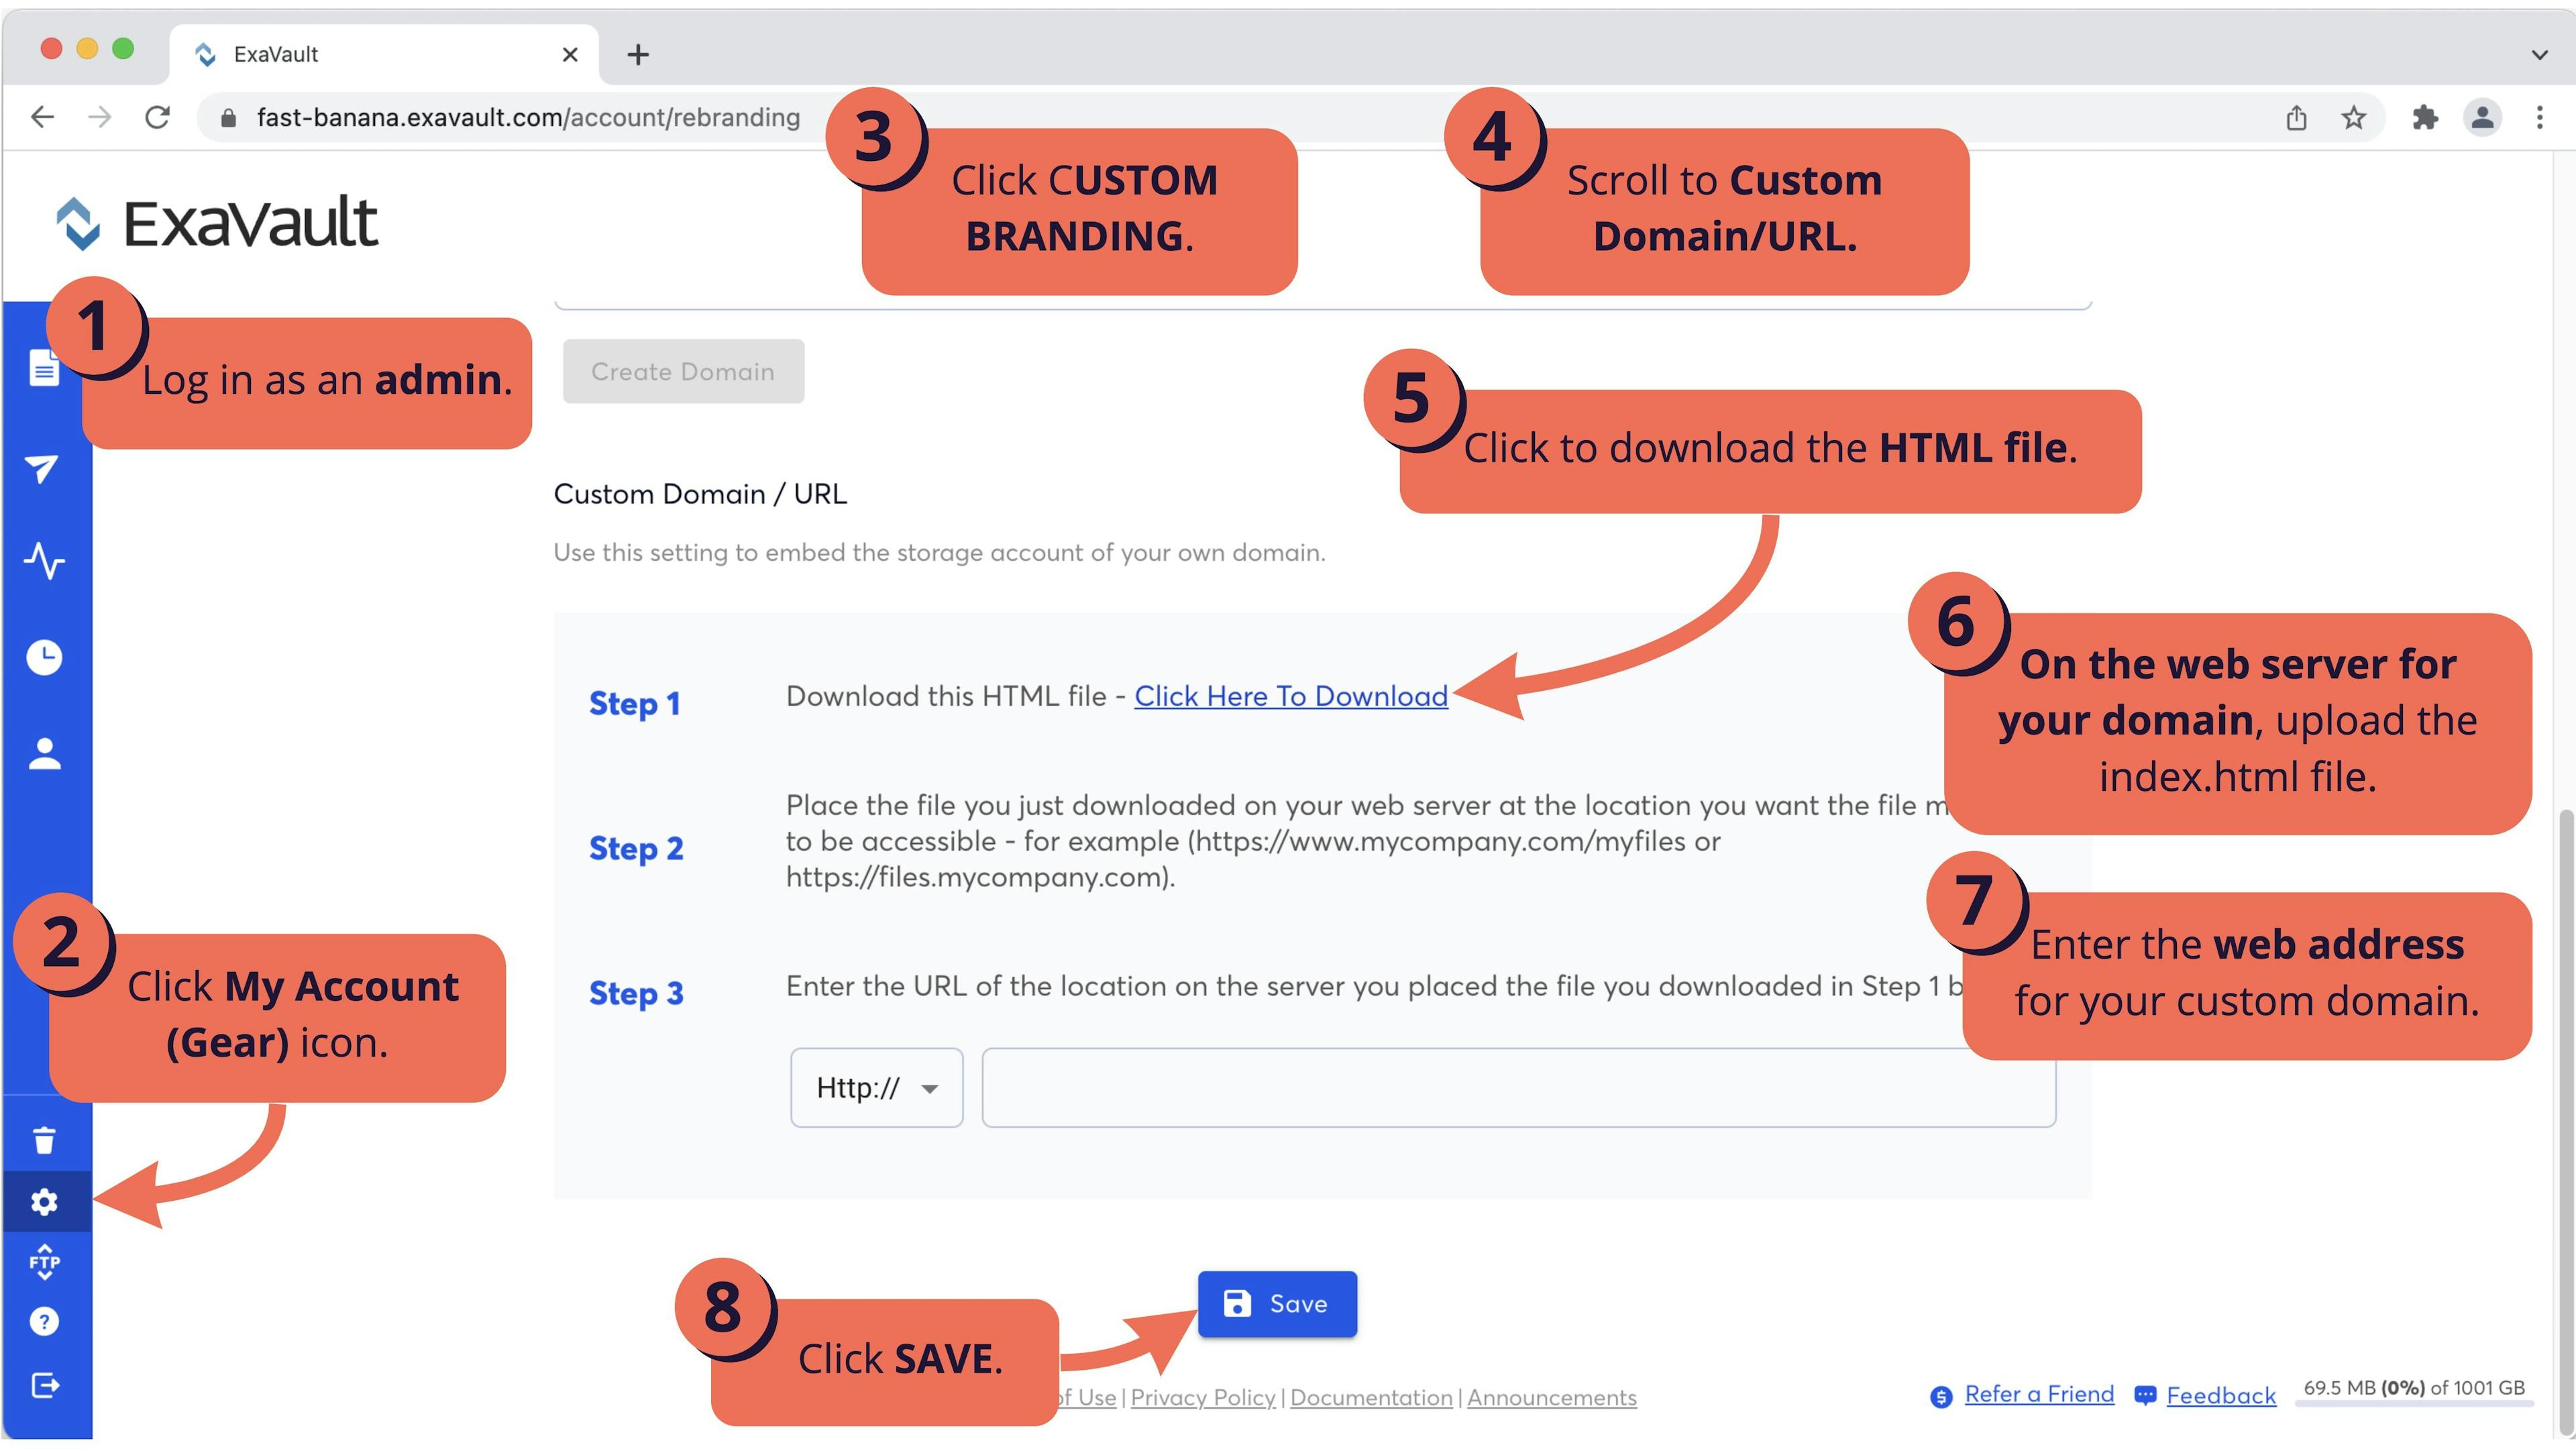
If you have access to a separate web hosting domain, you can set up a custom address for your users to access file manager. For example, rather than visiting https://mycompany.exavault.com to log in, you could direct your users to https://www.yourcompany.com/files or https://files.mycompany.com/ instead.
Using a custom URL requires you to download a small integration file and place it on your web server at the URL you'd like to use.
To set this up:
1. Log in as an Admin user for your account.
2. Click the My Account button on the main toolbar.
3. Click the CUSTOM BRANDING tab.
4. Scroll to the Custom domain / URL section
5. Under the heading of Step 1 click on the link named click here to download . A file named index.html will be downloaded to your computer.
6. On the web server for your domain, upload the index.html file from the last step to the location you wish on your website.
7. In ExaVault account again, find the heading for Step 3 and enter the address that takes you to the index.html file you uploaded to your server.
8. Click the SAVE CHANGES button.
And that's it! You should be able to view your account by visiting the address you entered under Step 3 of the settings. Any email links (such as send files or shared folder invites) and notifications sent from your account will direct users to the new address.
The custom domain will only work for our web interface. If you also want to access your account via FTP at a custom domain, you'll need to set up a CNAME record. For details, please see our CNAME setup page.
Table Of Contents
Support Library
Still Have Questions?
Email Us
Don't see the answer you need? Drop us a note, and our support team will email you back.
Send Email


