How to Access an FTP Server from the Browser
There are many ways to transfer files – FTP being one of them. See how a web browser can server as an FTP client. Read More
Published on 20 Apr 2021
In today’s fast-paced world, manual work creates a huge drain on resources and prevents your clients from receiving the quick results they have come to expect over the internet. Thankfully, technology provides many options for automating manual tasks that must be routinely completed.
This post reviews a basic setup for automations using a Mac operating system (Big Sur Version 11.2.3 on a MacBook Air), Transmit FTP Client, and cloud SFTP storage with ExaVault. If you already own a macOS computer, you can create this automation for free with software trials.
Even if you do not plan on using the exact software in our example, many of the tips work when applied to different software packages and workflows.
Your goal is to identify any tasks that can be automated to save you and your team valuable time and provide reliable results. For this example, we will be addressing the following use case:
Every week on Monday, I need to download the latest version of a data document (users_transactions.doc) to update internal reporting metrics.
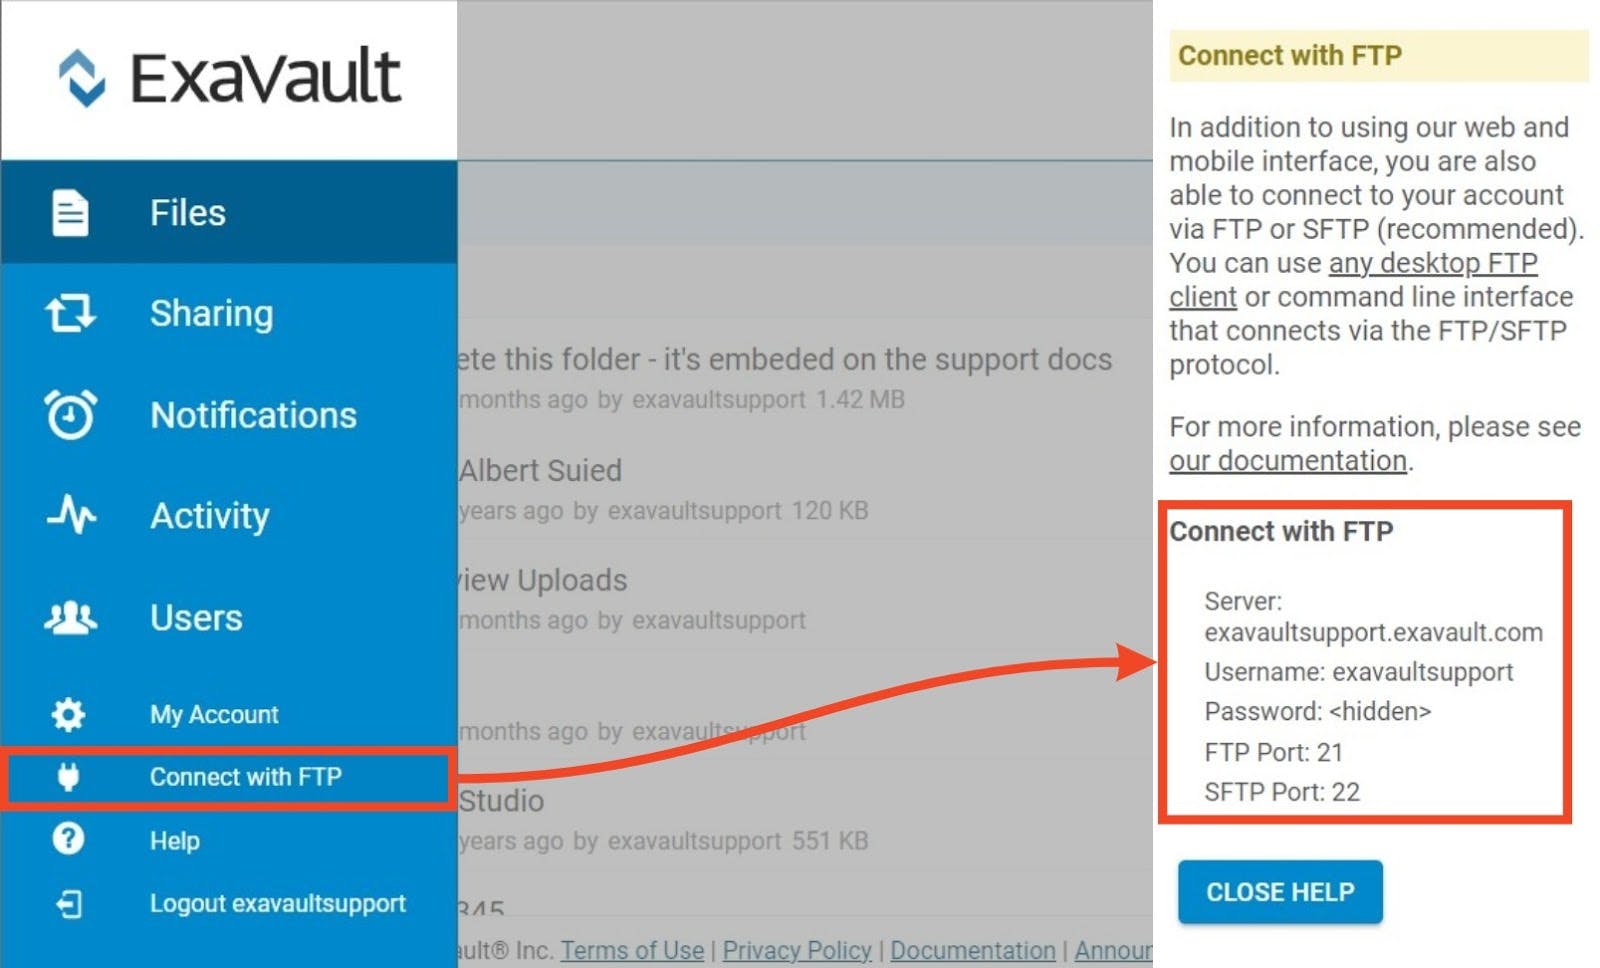
For connecting an FTP client to your SFTP server, you will typically need some combination of the following information: Protocol, Port, Address / Server / Host, Username, and Password.
If you need an SFTP server for setting up this automation, visit ExaVault.com and select “Start My Free Trial” to have an operating SFTP server running in about 5 minutes.
You’ll find the connection information in ExaVault by using the Connect with FTP option from the left navigation menu.

If you have Transmit installed and are familiar with FTP Client software, you can skip to Step 2.
Otherwise, watch our video on how to get started with Transmit FTP client. Or, follow the instructions below.
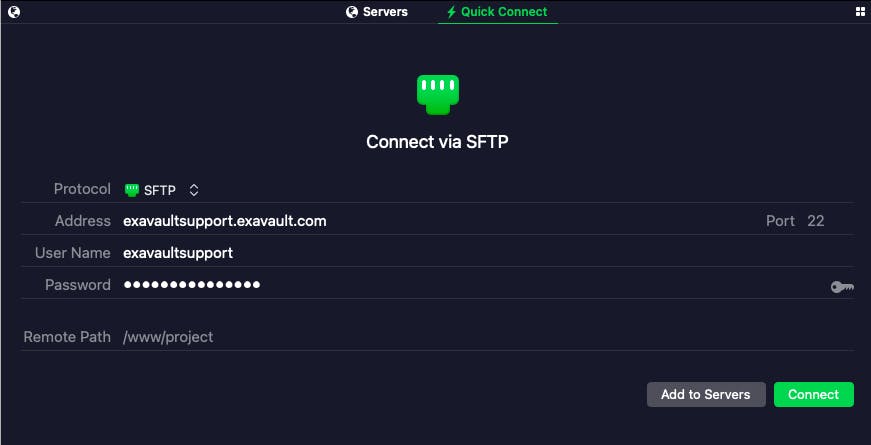
If you have never connected an FTP client to a cloud-based SFTP server, follow these steps to confirm you are able to connect. You can visit panic.com/transmit and select Try It > Download Transmit Now for a free seven-day trial for this setup.

Once you establish a successful connection, your files in the ExaVault server will replace the Quick Connect screen. The right side pane will show the folders and files on your local machine.
On your Mac, open the Automator application. Search for the application by using the ⌘+Space shortcut to open Spotlight Search and type automator.
First, you will need to enable the Transmit FTP Client automations by selecting Automator from the macOS menu bar. Then, select Third Party Automation Actions…. Check Enable Automator Actions from Third Parties and click OK.

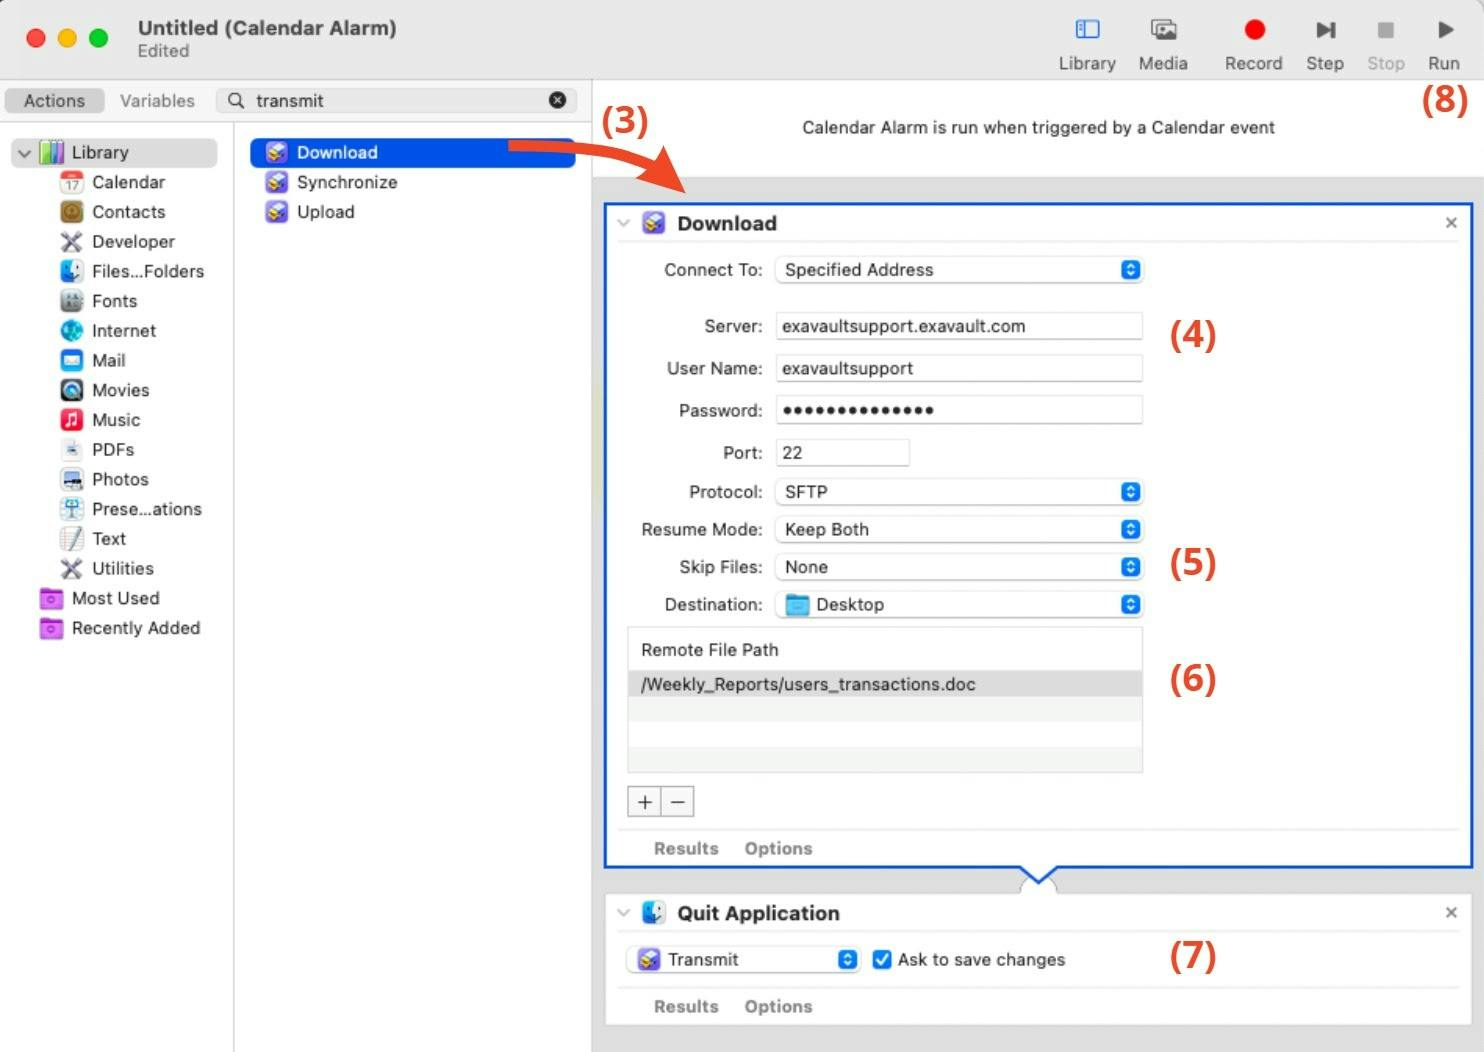
After third party actions are enabled, follow these steps to create your first automation with Transmit:

Some trial and error is often necessary to get the Automator set up as expected. But, once you receive the Workflow completed message and desired results, select File > Save and name your Calendar Alarm.
If your version of macOS encounters errors when saving, this Apple thread has steps for enabling additional permissions required.
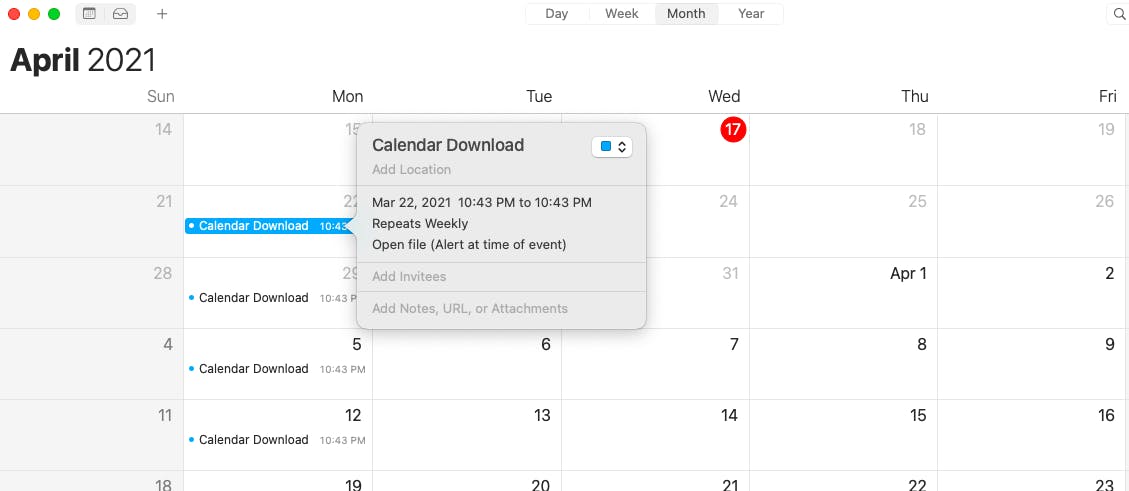
After you have saved your Calendar Alarm, the Calendar application will automatically open with a new event named after your saved workflow. Open the event to select the date and time of the first occurrence. In addition, select Repeat Weekly for the event to automatically run each week.

Your automation is now set! Once you have successfully created this first automation, you can create new automations for calendar events or other triggered actions. Simply update the specific options outlined above.
Ready to get started automating your file transfers? Try ExaVault today!

There are many ways to transfer files – FTP being one of them. See how a web browser can server as an FTP client. Read More

Need a quick tutorial to help you get started with FTP? Learn how to connect to an FTP server. Read More